

SCCM by Davis: “Migrating SCCM 2007 to SCCM 2012 – Part 3 The Plan With a checklist” plus 19 more | |

- Migrating SCCM 2007 to SCCM 2012 – Part 3 The Plan With a checklist
- System Center 2012: Configuration Manager-Driver
- SCCM 2012 WTF moment
- Developing the Server Architecture
- #3 troubleshoot: OSD – Content location request for IDXXXXXX:X failed (Code 0x80040102)
- Planning Boundaries 2012
- Deploy APK (Android) app in SCCM 2012 with Windows Intune Connector
- Create multiple AD User accounts with PowerShell for testing in SCCM lab
- PowerShell is King – I need to monitor OS Deployment in MDT 2012 not using Deployment Workbench
- #2 Troubleshoot: WSUS Remote Configuration failed
- Sherry Kissinger wrote a new post, ConfigMgr Inventory: Who is using Outlook PST files, where are they, and how big are they?
- Calvin Danna became a registered member
- Eric__! joined the group System Center Service Manager
- Eric__! joined the group System Center Configuration Manager 2007
- Eric__! joined the group Microsoft Deployment Toolkit (MDT)
- Eric__! joined the group Configuration Manager Queries, Reports, and MOFs
- Eric__! joined the group Operating System Deployment
- Eric__! joined the group System Center Orchestrator/Opalis
- Eric__! joined the group System Center Operations Manager
- Eric__! joined the group System Center Configuration Manager 2012
| Migrating SCCM 2007 to SCCM 2012 – Part 3 The Plan With a checklist Posted: 10 Mar 2013 07:16 PM PDT This is the checklist/worksheet I am using for the migration. I will update this as the install progresses. At this point I have brought up the 3 new servers and I am in the process of installing the SCCM 2012 environment. This checklist came from http://technet.microsoft.com/library/gg682006
| ||||||||||||||||||||||||||||||||||||||||||||||||||||||||||||||||||||||||
| System Center 2012: Configuration Manager-Driver Posted: 09 Mar 2013 08:47 PM PST
System Center 2012: Configuration Manager (Driver) Halo semua apa kabar?, baru bisa nge-post lagi nih, hehe. Sama seperti sebelumnya saya akan membahas mengenai SCCM 2012 semoga tidak bosan ya
Driver di SCCM 2012 digunakan untuk memberikan update driver pada klien baik itu NIC, Sound, dll. Baik langsung saja 1. Jalankan aplikasi System Center Configuration Manager 2012, buka Software Library pilih Driver klik kanan pilih Import Driver.
2. Maka akan ada tampilan Wizard seperti ini.
3. Browse file driver yang sudah di extract (Jangan file .exe). Klik Next.
4. Berikut detail driver yang telah di import, tentukan kategori sesuai dengan product.
5. Apabila sudah memiliki driver yang sudah disatukan dalam satu package maka driver yang baru di import bias dimasukkan kedalam package yang sudah ada. Klik Next.
6. Disini apabila driver yang di import berupa driver NIC dapat di Add kedalam Boot Images. Klik Next.
7. Berikut lampiran summary driver yang di import.
8. Import sukses. Klik Close.
9. Pada option Driver terdapat Driver yang telah di import.
10. Untuk melakukan update Boot Image yang telah ditambahkan driver NIC Client, klik Boot Images pilih boot image klik kanan dan pilih Update Distribution Point.
11. Tampilan wizard. Klik Next.
12. Progress update dan pada log di CMTrace sebelah kiri tidak ada error.
13. Update sukses. Klik Close.
Selesai,Semoga Bermanfaat. 0.000000 0.000000 | ||||||||||||||||||||||||||||||||||||||||||||||||||||||||||||||||||||||||
| Posted: 09 Mar 2013 02:46 PM PST We've been migrating from SCCM 2007 to SCCM 2012 at work. One very interesting part of SCCM 2012 for us has been the support for Mac OSX that was added in SCCM 2012 SP1. We have about 70 Mac clients, I guess, on top of about 1500 Windows clients, and those 70 clients need a dis-proportionate amount of time to manage, not because of any problems with Mac OSX as such, but rather due to the lack of real tools available to manage a large desktop roll-out. Please don't tell me about Apple Remote Desktop or Profile Manager at this point. I know about ARD. I use ARD. It sucks. As does profile manager. They're both better than nothing, but they are good examples of enterprise software that's designed and built by people who don't really understand enterprise requirements. So far in our testing it's proven very interesting. There's something very disconcerting about seeing the SCCM client pop up on a Mac, though I suppose we'll get used to it in time. The support for Mac OSX in SCCM is basic compared to the support for Windows clients, but this will only improve in time to be fair, and the most important bases are covered; we've installed packages and pushed down settings via custom .plist files with SCCM 2012 and it seems to work well enough. There's a few rough spots if you wanted to be picky but the fact that this works at all is impressive enough. Microsoft do seem to have missed a trick by not including remote desktop viewing in SCCM 2012 for Mac clients. As the Mac desktop sharing mechanism is essentially VNC then it shouldn't have been too difficult to add a VNC client or at least allow you to plug your own in. Oh well. Of more concern is the lack of support for Mountain Lion. Not sure when this will be rectified but it's a bit of a show-stopper – I think if businesses aren't already running Mountain Lion on their Macs then they must at least be making plans to move by now. One final, weird thing I'll leave you with: Microsoft include a version of System Centre Endpoint Protection for the Mac in this package. Installing Microsoft AntiVirus onto a Mac is weird enough (see below) but the strangest part of this is when you first download it. It comes down from the Microsoft servers as a .msi file. When you run the msi file, which you can only really do on Windows, it extracts a Mac .dmg file.The .dmg file then contains an installer which needs to be extracted from the .dmg so you can run it on your Macs. The intention of this is that you push it out via SCCM of course, but it still feels more than a bit strange to receive Mac software in a msi file. If you find that confusing to read about, just think about how it felt to my colleague Ian and I when we actually had to deal with it.  System Centre Endpoint Protection installed on a Mac And the question of whether or not Macs need AntiVirus perhaps isn't as clear-cut as it used to be these days, so this is quite a timely release on Microsoft's part. Especially for people who can't switch off well known vulnerability sinkholes like Java or Flash. Update: My colleague, Ian, has blogged about his experiences with managing Macs via SCCM. His post contains all the technical details I've left out and is very well worth a read. Part 1 of his article (up now) details our experience with the default SCCM client for the Mac, and Part 2 (soon) will detail the results of taking up the kind offer from Carlos / Parallels in the comments below. | ||||||||||||||||||||||||||||||||||||||||||||||||||||||||||||||||||||||||
| Developing the Server Architecture Posted: 08 Mar 2013 08:21 AM PST As with all Windows Server installations, use only hardware components listed in the http://www.windowsservercatalog.com/svvp.aspx For maximum supportability, it is best to use hardware bearing the Windows Server Hardware logo. Virtualization of all site systems roles is supported on Windows Server 2008 and 2008 R2 and Hyper-V Server 2008 and 2008 R2. You can find information about supportability on other virtualization products at http://www.windowsservercatalog.com/svvp.aspx Directly attached volumes on a storage area network (SAN) are supported, provided all hardware components are supported. ▶ 2.0GHz Pentium III processor You can find hardware sizing recommendations for specific site systems at http://technet.microsoft.com/en-us/library/hh846235.aspx For production systems, you should meet (and generally exceed) the recommended minimum specifications. For systems that handle large amount of HTTPS traffic, you should consider a cryptographic accelerator card. ConfigMgr does not support server clustering. If you use a dedicated SQL database server, you may use server clustering for high availability. | ||||||||||||||||||||||||||||||||||||||||||||||||||||||||||||||||||||||||
| #3 troubleshoot: OSD – Content location request for IDXXXXXX:X failed (Code 0x80040102) Posted: 08 Mar 2013 04:56 AM PST I was working with a new build and capture of Windows 8 deployment but at the begin of the task sequence in WinPE I got this message. Content location request for IDXXXXXXX failed (Code 0×80040102) See screenshot:
So, the only thing you have to do is, go to Administration in the console and go to Boundary Groups. Right click on the item and go to properties. I have got 1 item. Maybe you have more. This is an infra is migrate from a SCCM 2007 infrastructure. That's the reason of the name.
Go to the Reference tab.
And enable "Use this boundary group for site assignment" and choose for the correct site. Also add the content location. Choose for your distribution point.
You are done.. | ||||||||||||||||||||||||||||||||||||||||||||||||||||||||||||||||||||||||
| Posted: 07 Mar 2013 09:15 AM PST AD site and IP subnet boundaries suffer from the same major shortcoming: They do not An AD site used as a boundary contains the IP subnet of 192.168.14.0–192.168.15.255 In addition, clients unable to retrieve site information from your AD, such as workgroup | ||||||||||||||||||||||||||||||||||||||||||||||||||||||||||||||||||||||||
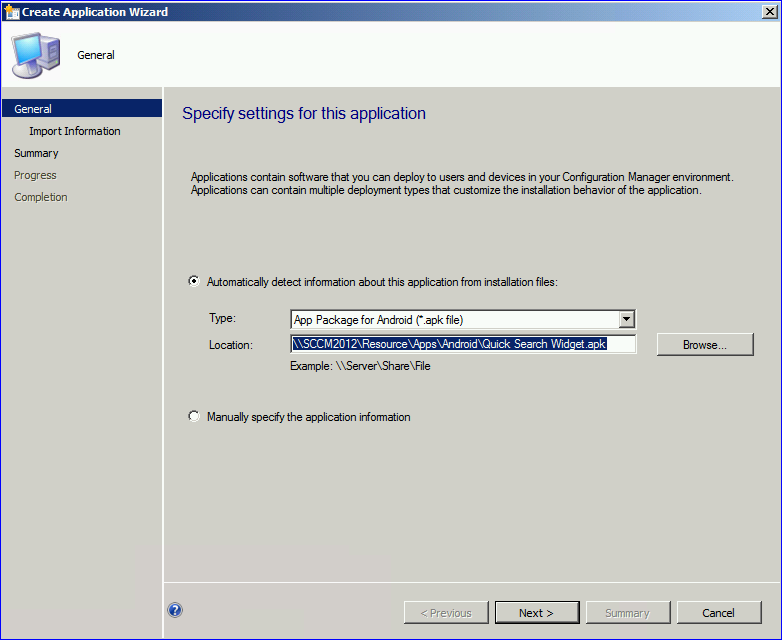
| Deploy APK (Android) app in SCCM 2012 with Windows Intune Connector Posted: 06 Mar 2013 06:23 AM PST A new blog about deploying apps via SCCM. This blog is not for all platforms, but only about Android because I have only an Android Smartphone to test it. The way to manage an Android device is not the same as for iOS or Windows RT/8. Windows Intune doesn't support direct management for Android, but only for iOS and Windows RT/8. This means you have to connect your android device to Exchange ActiveSync Services (EAS) to manage the device. It could be an on-premise Exchange or the Cloud Exchange like Office365. But the good part of this blog is that you don't need or have to use EAS for deploying apps to your android device(s). The only thing you need is the DirSync with your corporate active directory to the Cloud (Windows Azure Active Directory) the users must be familiar in Windows Intune for the log-in the Company Portal. For iOS and Windows 8/RT is not that easy, because for Windows Modern(Metro) app you have to contact the developer for the APPX file. This is called Sideloading. Sideloading is deploying/installing Windows apps without the Windows Store. For iOS you need 2 files for the app. The files are IPA (the app) and PLIST (a manifest file) For these files you have to contact also the developer. For configuring the Windows Intune Connector in SCCM, please read this blog: Windows Intune: Wave D and SCCM 2012 Service Pack 1 integration For configuring the DirSync, please read this blog: System Center 2012 Configuration Manager SP1 and Windows Intune – Configuring and Installing Active Directory Synchronisation (DirSync) So, let's begin to download an APK file from the Internet. I'm using the "Quick Search Widget.apk" for testing. I'm downloading the file to E:\Resource\Apps\Android\ and the folder Resource is shared. Go to the console and go to the Software Library in the menu. Right click on Applications and choose for Create Application.
Change type in the wizard to App Package for Android (*.apk file) The location is where you downloaded the apk file. Don't forget to use UNC path and not the local path. Like this \\SERVERNAME\Resource\Apps\Android\name.apk
Click Next
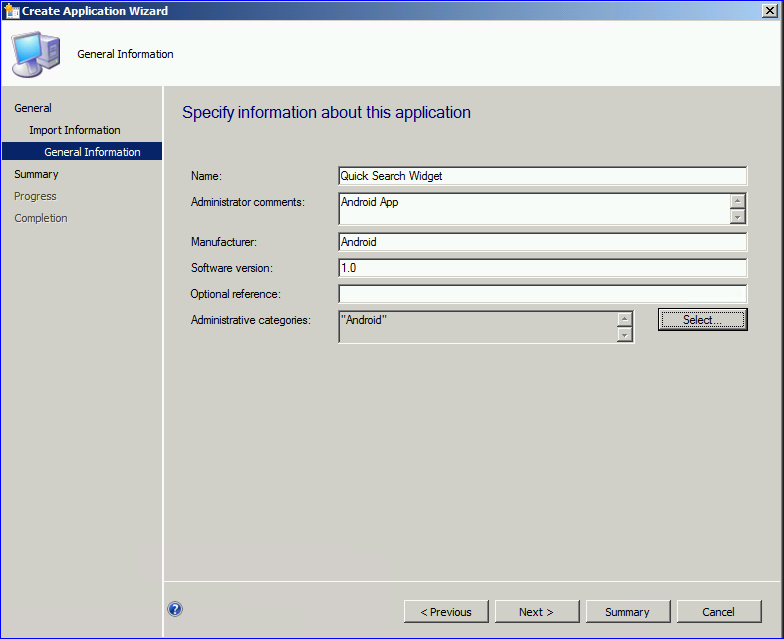
Click Next or add some information about the app.
Click Next
Click Close
Ok, we have added the app in SCCM. Now we have to make a User Collection. Go to Assets and Compliance and right click on User Collections. Choose for Create User Collection. In de wizard add some information about the collections. Give it a name and the limiting collection is All Users.
Click on Direct Rule. It opens a new screen. Click Next
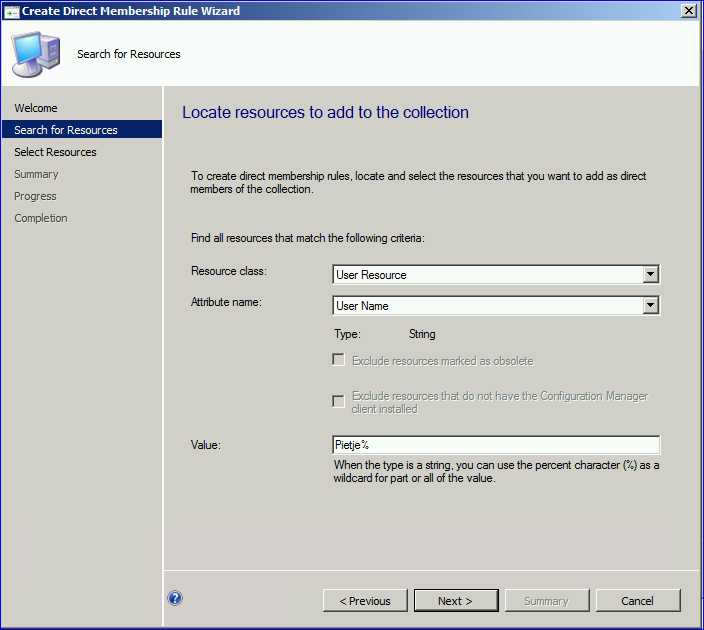
We have to find some users they are allowed to downloading the app from the Company Portal. I have 1 user and that is Pietje Puk. Resource class is User Resource, Attribute name is: User Name and Value: pietje% (% is a wildcard) You can also use SQL queries for a dynamic source and adding, but because of a lab env I'm using direct membership.
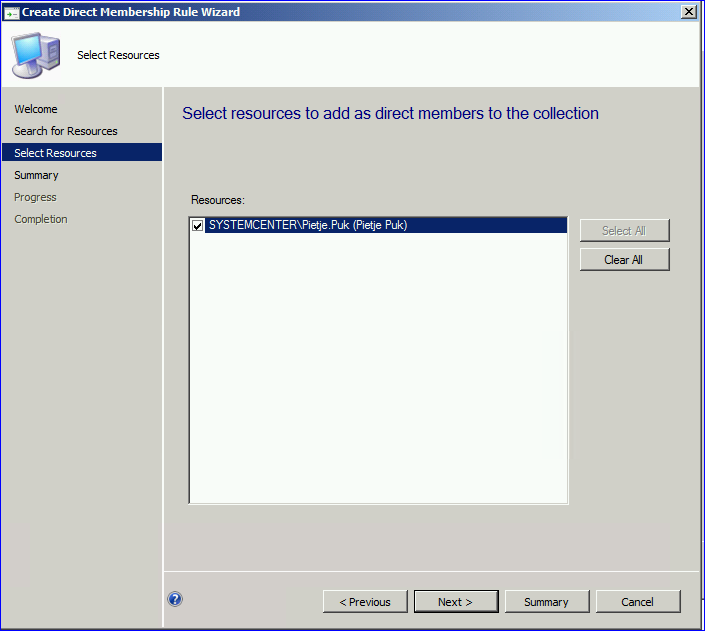
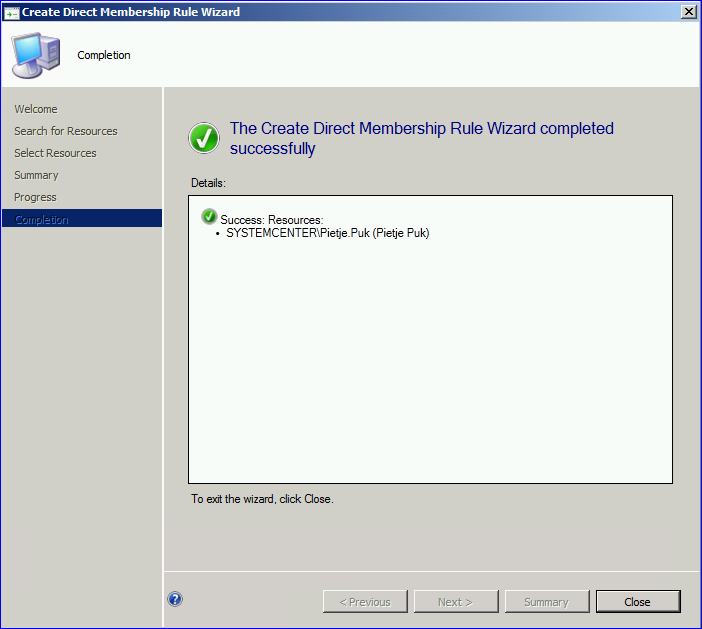
Select the user.
Click Next
Click Close
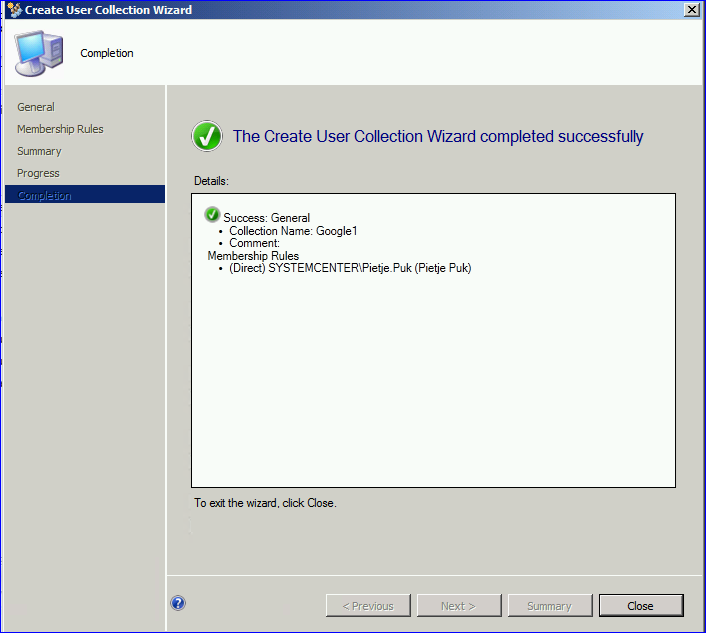
The user(s) are/is added. Click Next.
Click next.
The collection is created and ready for use.
Like this:
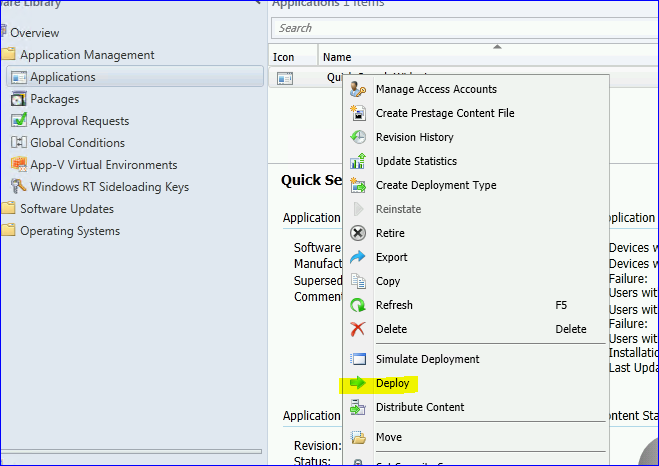
Now, we have to go back to Software Library and click on Applications. You will see in the right panel your Android App.
Right click on the app and choose for Deploy.
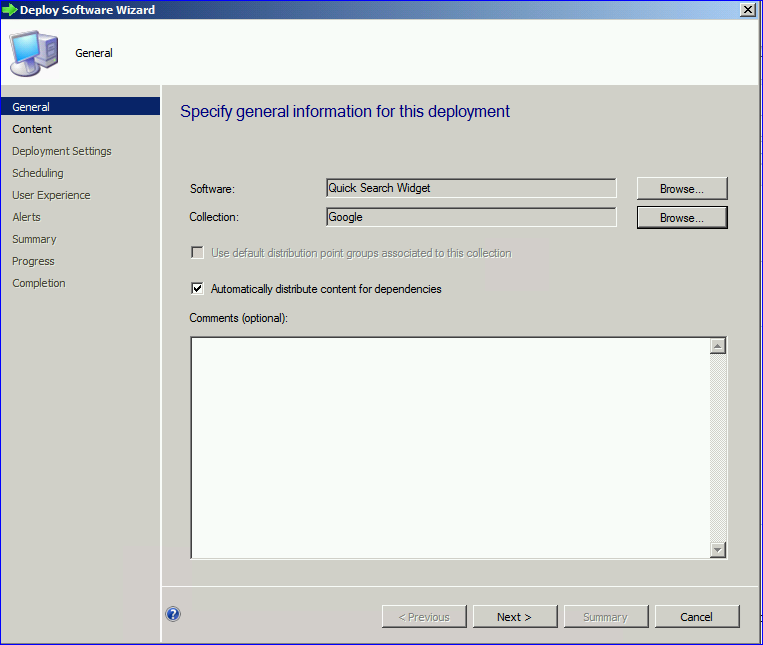
Collection is the new collection Google that we made earlier in this blog.
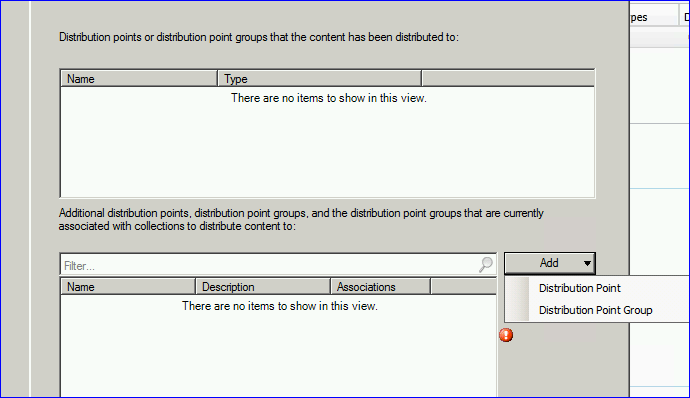
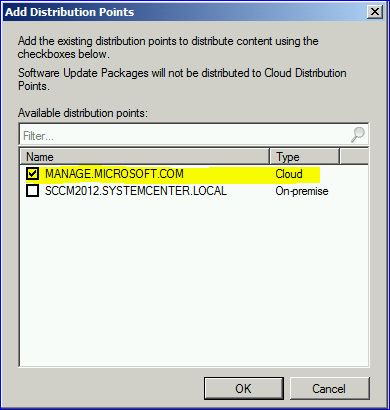
Click Add for adding a Distribution point.
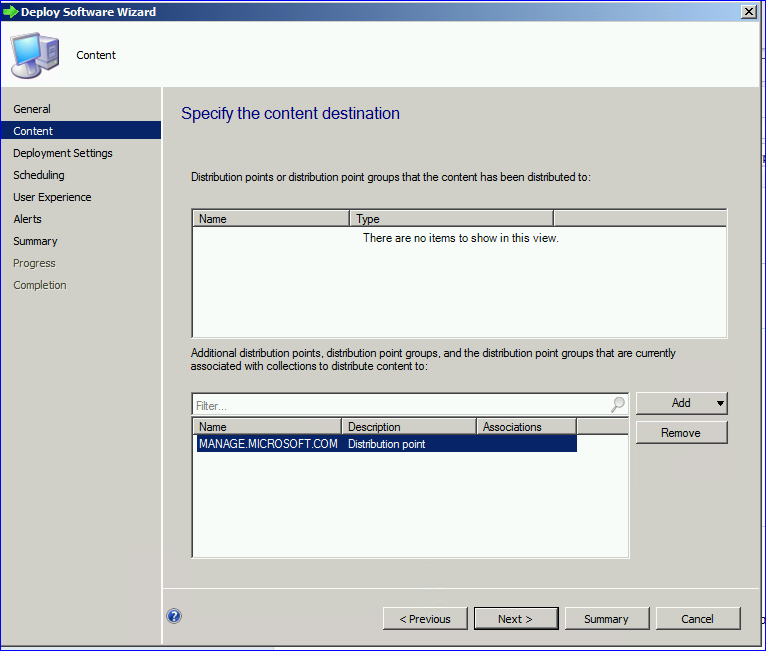
You will get 2 distribution point if you are using 1 primary site and Windows Intune integration. Select here for the Cloud (manage.microsoft.com). That is Windows Intune.
Click Next.
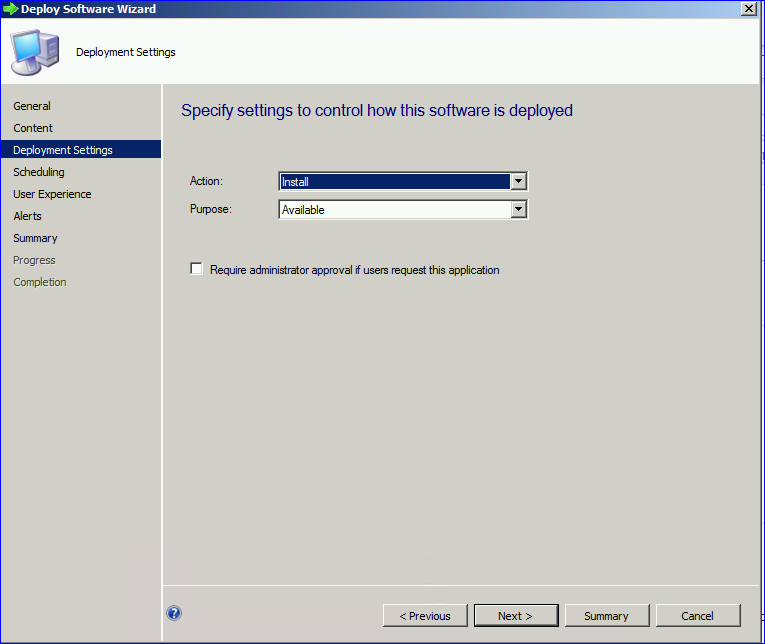
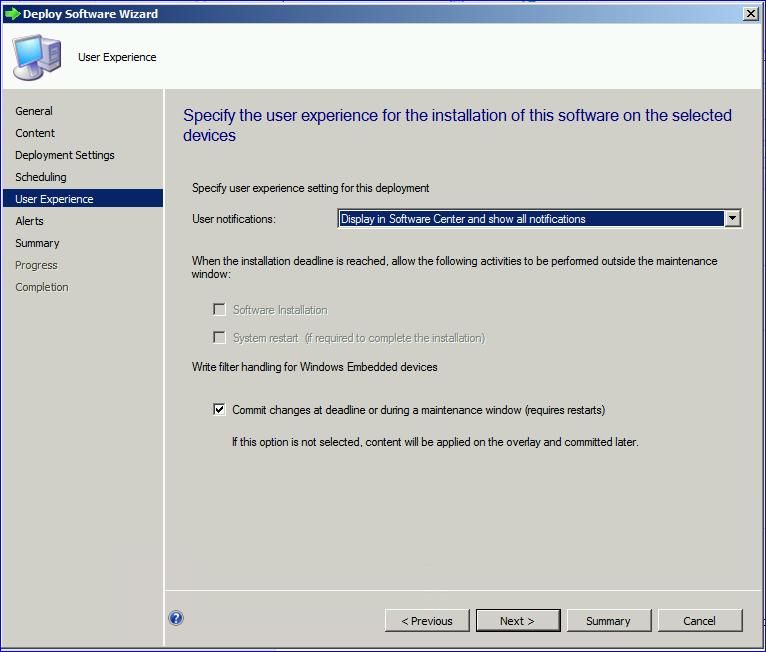
This is default. Click Next.
No schedule today, so leave it default.
Also default
Also default. If you use SCOM you could enable SCOM alerts
Click Next.
Click Close
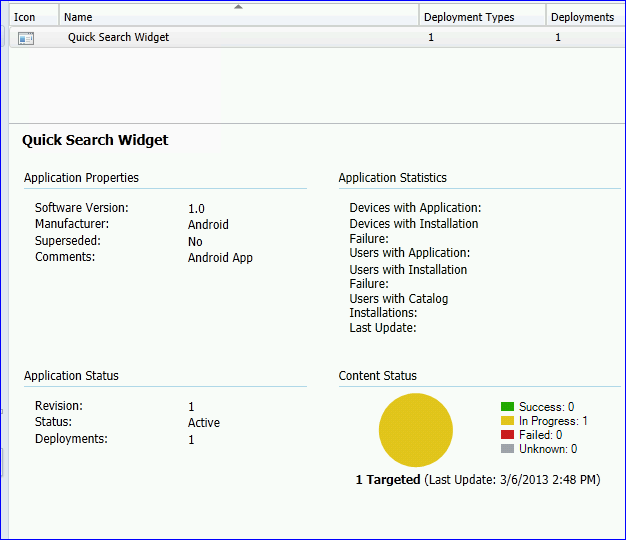
Ok, this can take a while. See the result of the app.
Ok after a minute the status is success (green)
Now we have to test it. Get your device and go to https://m.manage.microsoft.com Log in with the user that you added in the Google User Collection. Sorry, about the language. This is Dutch.
Click on the blue tile, Download Apps.
You will see the app, in my case Quick Search Widget. Click on the app.
You get some information about the app. Click on the button Download App.
And again click on the link Download App now.
Check the notification bar for the status.
Click on the notification. Choose the location for installing.
That's all, you have installed a "corporate" approved application from Windows Intune and SCCM 2012. | ||||||||||||||||||||||||||||||||||||||||||||||||||||||||||||||||||||||||
| Create multiple AD User accounts with PowerShell for testing in SCCM lab Posted: 05 Mar 2013 04:30 PM PST Recently, I needed to do some testing with custom user collections. The collections would be populated based on Active Directory attributes that are not normally discovered by Active Directory User Discovery, like Employee ID, Department, etc. For my testing, I needed a large pool of AD user accounts to test against, along with several other requirements. These requirements included a new OU for all the test accounts, the same password for all accounts, and different AD attribute values for each account. Setting up these test accounts up using Active Directory Users and Computers would have taken a long time. Instead, I created a PowerShell script to automate the process. To create the accouts, I added the new AD attributes to my Active Directory User discovery. After forcing a full discovery, I was able to create user collections that targeted the new AD attributes (example – user collection that contained users only with an Employee ID between EM00001 and EMP10000. Script #Creation of OU and placement #Create of AD User accounts $SamAccountName = $($user.samaccountname) New-ADUser -SamAccountName $SamAccountName -Name $Name -UserPrincipalName $UserPrincipalName -Displayname $Displayname ` } This slideshow requires JavaScript. | ||||||||||||||||||||||||||||||||||||||||||||||||||||||||||||||||||||||||
| PowerShell is King – I need to monitor OS Deployment in MDT 2012 not using Deployment Workbench Posted: 05 Mar 2013 03:59 PM PST Scenario:You are using MDT 2012 Update 1 (Lite Touch or Zero Touch), you have enabled MDT monitoring and you would like to know the current status of the OSD deployment, but you would like to read directly from the OData feed using PowerShell and maybe get a nice grid-view. Now, you might wonder why and that is easy, basically every blog post I have seen on this topic assumes you are logged on to the server where the MDT Workbench exists, but that is not always the case. Solution:Use PowerShell to get the data using the Invoke-RESTMethod, convert and read it as a Grid view Display on screen in text
Display using grid view:
PowerShell command to execute:You need to change MDT01 to the name of your deployment server for this to work. $URL = "http://MDT01:9801/MDTMonitorData/Computers" function GetMDTData { foreach($property in ($Data.content.properties) ) { GetMDTData | Select Name, DeploymentStatus, PercentComplete, Warnings, Errors, StartTime, EndTime | Out-GridView Download script here: http://sdrv.ms/WtxtnU/mike | ||||||||||||||||||||||||||||||||||||||||||||||||||||||||||||||||||||||||
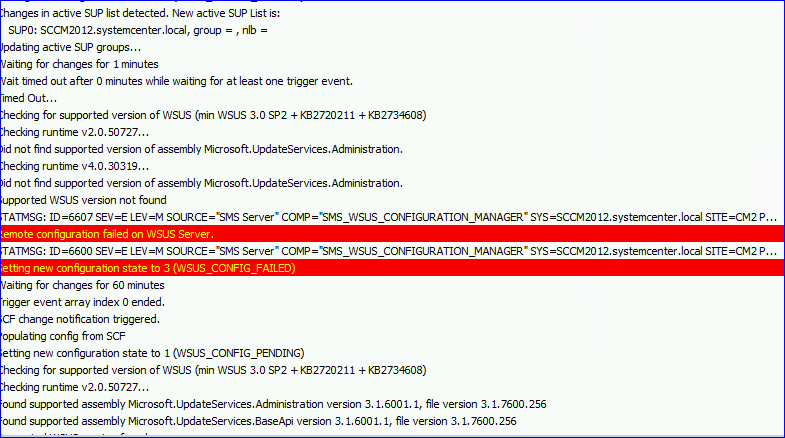
| #2 Troubleshoot: WSUS Remote Configuration failed Posted: 05 Mar 2013 03:08 AM PST Ok, this is number 2 troubleshoot, and an easy one. This blog is about configuring WSUS in SCCM 2012. After installing and configuring the role "Software Update Point", in other words SUP, is it possible that you received this warning in the logs. Error is:
The log is WCM.log in C:\Program Files\Microsoft Configuration Manager\Logs\
As you can see in the log the SUP will check the version of WSUS that you have installed on the server. Default installation via Server Manager is WSUS 3.0 SP2 without the hotfixes. This means you have to download KB2720211 and KB2734608. After that you have fixed this problem. After the installation SCCM can configure the WSUS remotely. Check the log beneath:
So, what I say, this one is easy to solve. You have to wait till the sync is done, can take a while. Be patience. Check also the component status in SCCM console.
TIP: Do not configure WSUS manual. You have to install the WSUS server only. The SUP role will configure the WSUS remotely. The settings must be configured in the SUP role and not in WSUS. Good luck. | ||||||||||||||||||||||||||||||||||||||||||||||||||||||||||||||||||||||||
| Posted: 20 Apr 2013 04:34 PM PDT
I can't think of anyone who has been supporting Outlook for more than a few years where they *haven't* been asked that question. Until now, the best answer we could come up with was "we can scan the local […] Comments: 0 | ||||||||||||||||||||||||||||||||||||||||||||||||||||||||||||||||||||||||
| Calvin Danna became a registered member Posted: 20 Apr 2013 08:01 AM PDT Comments: 0 | ||||||||||||||||||||||||||||||||||||||||||||||||||||||||||||||||||||||||
| Eric__! joined the group System Center Service Manager Posted: 20 Apr 2013 07:59 AM PDT Comments: 0 | ||||||||||||||||||||||||||||||||||||||||||||||||||||||||||||||||||||||||
| Eric__! joined the group System Center Configuration Manager 2007 Posted: 20 Apr 2013 07:59 AM PDT Comments: 0 | ||||||||||||||||||||||||||||||||||||||||||||||||||||||||||||||||||||||||
| Eric__! joined the group Microsoft Deployment Toolkit (MDT) Posted: 20 Apr 2013 07:57 AM PDT Comments: 0 | ||||||||||||||||||||||||||||||||||||||||||||||||||||||||||||||||||||||||
| Eric__! joined the group Configuration Manager Queries, Reports, and MOFs Posted: 20 Apr 2013 07:57 AM PDT Comments: 0 | ||||||||||||||||||||||||||||||||||||||||||||||||||||||||||||||||||||||||
| Eric__! joined the group Operating System Deployment Posted: 20 Apr 2013 07:57 AM PDT Comments: 0 | ||||||||||||||||||||||||||||||||||||||||||||||||||||||||||||||||||||||||
| Eric__! joined the group System Center Orchestrator/Opalis Posted: 20 Apr 2013 07:57 AM PDT Comments: 0 | ||||||||||||||||||||||||||||||||||||||||||||||||||||||||||||||||||||||||
| Eric__! joined the group System Center Operations Manager Posted: 20 Apr 2013 07:57 AM PDT Comments: 0 | ||||||||||||||||||||||||||||||||||||||||||||||||||||||||||||||||||||||||
| Eric__! joined the group System Center Configuration Manager 2012 Posted: 20 Apr 2013 07:57 AM PDT Comments: 0 |

 . Kali ini Saya akan membahas mengenai Driver di SCCM 2012.


 G
G


| You are subscribed to email updates from SCCM by Davis To stop receiving these emails, you may unsubscribe now. | Email delivery powered by Google |
| Google Inc., 20 West Kinzie, Chicago IL USA 60610 | |
No hay comentarios:
Publicar un comentario